“Pre-Finished” Neck – April 2013

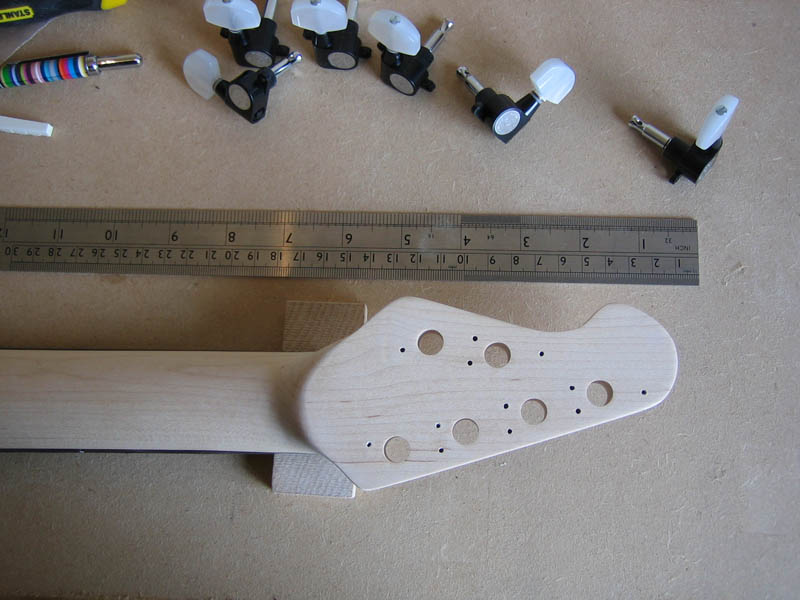
I decided to drill the holes in the end. I used a 2mm drill bit (1.5mm seemed too tight) for the holes. Using a screw to mark the holes worked a lot better than a pencil mark.

I’m going with Schaller M6 Nylons, which are lighter than the metal M6’s. Annoyingly I’m giving up on locking tuners (which I love) and for some reason they come with the larger pearl buttons. I could swap them for the smaller buttons later if it still bothers me. I wanted to try some tuners beyond the straight Schaller locking (or the Sperzels on my Parker / Strat). I noticed last week the new Gotch stealth tuners which look perfect for a small headstock – maybe next project if I can get used to non locking. The Schaller’s just fit.

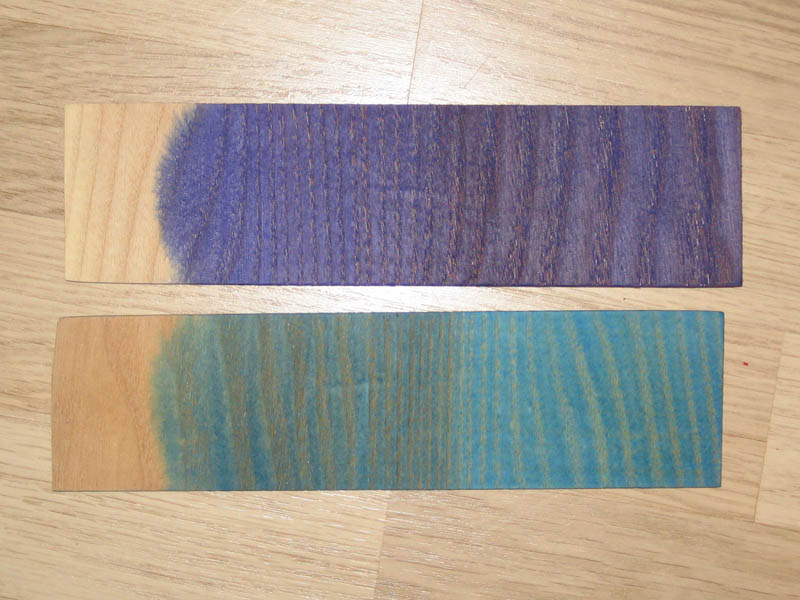
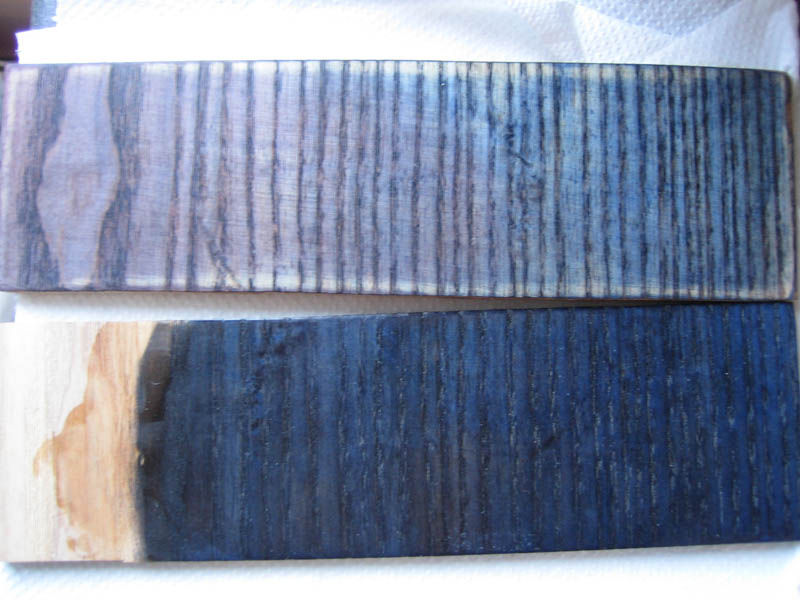
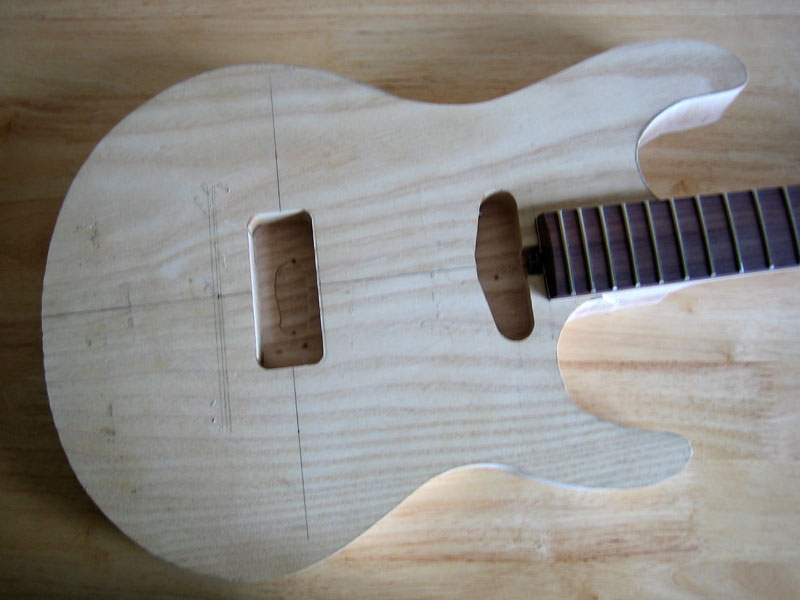
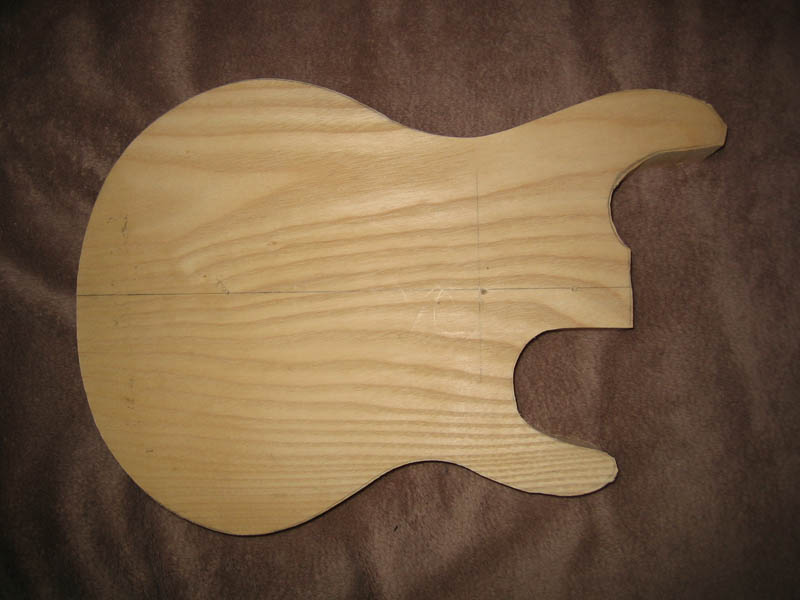
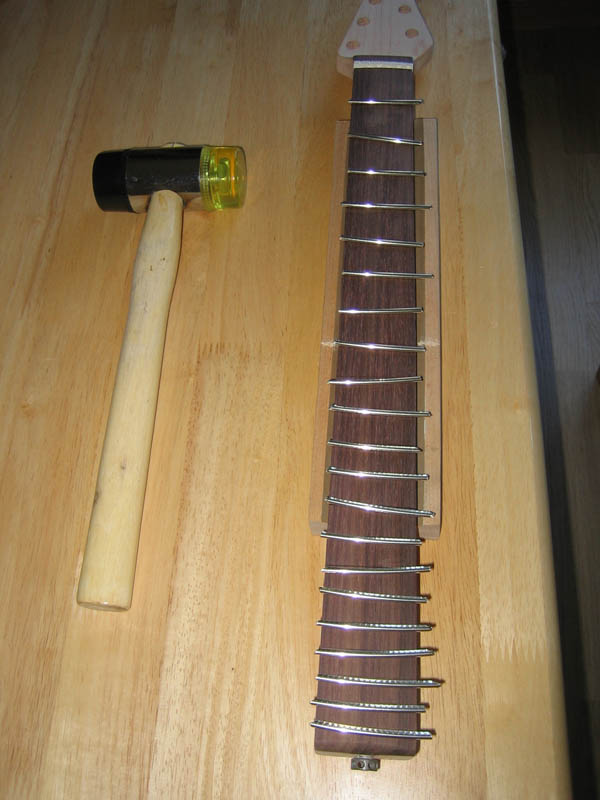
The neck is now done, time to wait for it to get warm enough to finish. Now to get the body finished and ready for dyeing. I thinking of going back to the blue alchol dyes are I never got the colour in to the grain enough with the water ones for my satisfaction. Maybe I’ll work with them on another project. After looking at how much dust was in my garage (which can’t be good for me), it was time to invest in a dust extractor. I’ve got a Festool CTL Midi on order, which everyone on the net seems to rave about – hopefully it will clean up the place.

Posted in Guitar Two | Comments Off on “Pre-Finished” Neck – April 2013

Final Shaping Neck – April 2013

The test fit of the neck looks “ok”, though when shaping/sanding it seems I have again thinned the neck on the high e side. Oddly the low e side seems dead straight, while the high e bows in around the 5-10 frets. For the next neck I need to look into ways of avoiding this.

The neck heel and headstock have now been blended by hand and I’ve gone up to 180 grit on the neck. I need to get some 120 grit as I jumped 80 to 180, which is probably too big a step. Some sites say only to go to 220 before finishing, others all the way up to 600 if you are spraying a finish. I’ll probably go to 220 and then try out some of the cheap 500 grit sanding discs I picked up off Ebay for the front and back of the headstock. I won’t do this until it’s warm enough to spray, as the neck might get knocked while in storage.

I can’t decide if to drill the holding screws for the tuners now, or after it’s finished. Everyone else seems to wait, however I’m concerned about marking the surface during drilling. Not sure, especially with my drill press which seems to be wandering more these days (though it could be I’m noticing it more). Due to space and dampness in the garage, I’ll hold off getting a good one and make do.

I have gone though one round of levelling the frets (I’m still a long way from being good at fretting). I will leave it at this point until I’ve built the guitar and can play test it before final touches and polishing of the frets. As I found last time, the fretting matters a lot to the end feel. One to practice.

Posted in Guitar Two | Comments Off on Final Shaping Neck – April 2013

Winter Break – March 2013

Well due to the wet weather and darkness, I haven’t done any work on the guitar for ~4months. Last weekend I cleared out the garage and got it ready. It’s still wet this weekend but almost light and warm enough to do some small bits out there.

Today I drilled the neck bolt holes. Luckily I spotted as the second drill hole started that, due to the hardness of maple, the 4mm drill bit wandered a long way. I stopped this hole and changed plan. If in the future I get a workspace which doesn’t suffer from excessive damp, then I’ll invest in a nicer drill press. For now I needed another way.

First I drilled a 2mm hole, then a 3.2mm (I’ve broken my 3mm drill bit) before finishing with the 4mm drill. I then fitted the neck with three bolts and used the body as the drill template for the miss drilled hole. Worked well (the first hole has also deflected, but not by enough to be a problem). The neck joint is far beyond the quality of the first one I did, there is a small gap at the end, however over all I’m happy with it.

Next step is to use a spare M6-locking tuner (which bolt in and not push in), to make sure the neck angle is ok for the bridge.

Posted in Guitar Two | Comments Off on Winter Break – March 2013

Aniline Dyes Water Soluable – Nov 2012

So the dyes arrived from America this week. They are ~15grams each, which makes 1-2 litres of dye. However, I didn’t have any scales which could measure tiny quantities, so I had to do the test mixes with guess work (and I got it wrong!). The dye looks very strong in the water, however it goes on a lot lighter, it then dries to a different colour again.

The bottom one is actually blue dye! It was far too weak and when combined with the yellow of the wood ended up not quite as I hoped. I’ll consider this a prewash, sand it back and then do another coat of a stronger solution.

The top is purple as a stronger solution. The dried colour is a lot more blue than the wet colour (which was a stronger purple). Against the wood grain has a big effect on the end colour. The purple dye has lots of little bits in it, I should of filtered it before applying it. I’ve picked up some coffee filter papers for the next go. I’m still struggling to get the dye into the grain. I’ll probably leave the purple one as it is and try applying the sealer over the top.

I need to hunt for some more bits of ash in the house and try a water based one with black, then colour, then sealer and tru-oil.

Posted in Guitar Two | Comments Off on Aniline Dyes Water Soluable – Nov 2012

Wood Finishing – Nov 2012

The weather has over taken me, it’s getting pretty damp in the garage and light isn’t good, so I don’t think I’ll get the guitar finished this year.

Instead I’m switching my focus to learning how to finish wood, which is something I rushed on my first build. My first attempts are with a solvent based dye from Rothko and Frost. I’d say finishing wood well is at least as hard as building the guitar to this stage. I’m not doing for spray finishes due to a lack of equipment and I don’t fancy dealing with toxic chemicals of that level at this point.

Trying it on some off cuts, the top piece of wood is a quick pass through all of the coats to make sure they work together (not paying too much attention to careful sanding between layers). This consisted of:

  1. Black coat
  2. Sanded back with 180grit (should of been 220-320)
  3. Blue coat, blending into a blue/purple
  4. Birchwood Casey – Sealer and Filler
  5. Sanded back with 400grit (I was surprised just how quick I over sanded at this grit, as you can see I went through the stain by accident)
  6. Two coats of Birchwood Casey Tru-Oil
  7. Sanded with 600 grit
  8. Birchwood Casey Wax top coat

The ash needed a lot more filler than I used and I have some small bubbles in the finish. I also tried dye after the sanding sealer (this doesn’t work, don’t do it) and diluting the colour of the blue down, which didn’t give a great result.

The second piece is a slower and more careful attempt at a blue only piece of wood. Currently it’s had one coat of the sanding sealer and needs one or two more. I’ll continue working through the stages.

I have some water based dyes in the post from the USA, as I’m finding the solvent based dyes hard to work with as they dry very quickly. I’m hoping this will give me time to work the dye into the grain, as you can still see a lot of un-dyed flecks in the grain. The powered aniline water soluble dyes are going to be a lot more hassle to prep, but I’m hoping easier to work with in the end. I have black, blue, red and purple (yes I could of made purple from the others, but for little extra it costs compared to postage I thought I’d cheat). Next post if hopefully my first go using these (and finishing off the bottom piece of wood from this set).

Posted in Guitar Two | Comments Off on Wood Finishing – Nov 2012

Take 2 (or 3) – Oct 2012

Here is a shot of the first test fitting of the hardware. I haven’t done any finish sanding on the body, so there is still a lot of tooling marks. This was to check everything worked before I moved onto finishing.

I’m pretty happy how close I came to the concept image for the guitar, it shows that it’s worth designing it in Photoshop to get a feel.

The last bits to do are make a cavity cover and drill the ground wire for the bridge. After this point, once I’ve done the final shaping on the neck and fretting, is to learn more about how to finish wood (including staining/dyes).

Posted in Guitar Two | Comments Off on Take 2 (or 3) – Oct 2012

Change of direction (start over) – Oct 2012

So it has been a long time since I updated this blog. Not long after the last update, I did a test fitting of the bridge. Somehow during the neck template design or sanding, the neck ended up too narrow at the body end.

I can’t find a bridge out there which has a narrow enough string spacing to make the neck work (the high and low E strings would fall off the neck). After much pondering, the only thing was to build a new neck.

I also decided to start the body over, as the neck pocked wouldn’t be the right size and it would look like a bodge.

I still hope to use the body one day for a glued in neck, cutting a new deeper and longer neck area. This may go as far as to be a semi neck-through guitar.

So I repeated all the steps talked about and build a new body from Ash.

Posted in Guitar Two | Comments Off on Change of direction (start over) – Oct 2012

Pickup Routes Cut – June 2011

The guitar building stopped for a while due to travel and weather, however it’s back underway.

The neck pocket has been cut. I used clamped bits of wood around the neck to form a “negative” of the neck end. This was then used to cut some 12mm MDF with the neck pocket shape. The end results when transferred onto the guitar are fairly good. The end is a bit scrappy, as the neck is square ended (which is not possible to cut with a router). Some chisel work as got it a lot better than the last guitar, but the next one needs more thought!

The wheel of the truss rod sits in a channel between the neck and the pickup.

The neck and bridge pickup holes have been cut and the hole linking them drilled. The bridge pickup hole is tight, which means wiring the neck pickup past it will be tough.

Posted in Guitar Two | Comments Off on Pickup Routes Cut – June 2011

Body Start – May 2012

I traced the template onto the body and somehow managed to make the horns smaller than they should be. I only found out after I took the body onto the bandsaw and cut around the outline. How I managed this, I do not know, but it should be saveable.

Instead of using double sided sticky tape, I used counter-sunk screws to attach the template onto the body (one screw in the neck pocket, one in the neck pickup) and used a small bit of tape at the bottom. It took three passes with the router to get the body to shape:

  • Template bit following the outline of the MDF
  • Then removing the MDF as my router didn’t have enough plunge range, running the bit along the side of the already cut body
  • This still wasn’t enough, so I flipped the body over and used a router bit with a guide wheel at the top, which did the last 4-5mm.

I need to come up with a new plan for the horns, but other than that the body is ready for starting the neck pocket.

Posted in Guitar Two | Comments Off on Body Start – May 2012

Fretting – May 2012

Here is the neck, just before I fretted it.

I decided to fret the neck before final sanding this time. I’m using better quality fret wire, which meant it was a lot harder to cut. There are some marks on the frets that I hope will polish out.

Next time I need to look into matching the slot width to the wire and a better method for cutting the frets to length.

Posted in Guitar Two | Comments Off on Fretting – May 2012